Showing posts with label Low Cost Fabric. Show all posts

Wednesday, January 29, 2014

Newborn DIY dress

Remember the fabric I bought at the thrift store over the weekend? I paid $.50 for some cute pink knit fabric with blue sailboats on it.


I found an old onesie I had laying around (9 month size) and cut the bottom off of it.

Next, I cut two rectangles from the knit fabric, they measured about 3 inches wider than the width of the onesie. I sewed the two triangles together, front to front, creating a tube.

Then I sewed the "tube" to the oneside and hemmed the bottom.

For the "necklace" I ironed on some heat n bond to a piece of the knit fabric and then cut out the circles. Then I removed the backing and ironed them onto the top of the onesie. Finally, I sewed through the middle of each circle with a decorative stitch.

Now Miss Charlotte has a dress that was made just for her :)


Wednesday, February 6, 2013

Bathroom Curtain

I've been in a mood of switching things up lately in our house. I've gotten tired of the same old same old and am ready for a few changes...but don't want to spend a lot of money of course.

Here is how my bathroom window looked before. I think the white curtain on the white mini blind just wasn't working for me...it needed some color don't you think.


I purchased some brown material a few weeks ago at a thrift store and hadn't used it for anything yet. Since there is brown in the shower curtain and our vanity and towels are brown I thought it would work well here.

I simply cut the piece of material the width I wanted and length I wanted and then hemmed the edges. This is how it looked after hanging it up.


Pretty Ugly. Next I looped ribbon over the whole curtain and hot glued the ends together. The ribbon was a little shorter than the curtain so that the material gathered together at the bottom. I did this twice.

DIY Bathroom Curtain


DIY curtain Easy

This was the end result. I took a few pictures in different formats trying to get it to look how it does in real life. The last picture is probably the closest. I like it better than the white but am not totally sure if I love it yet. What do you think?


Tuesday, January 22, 2013

My $.50 vintage skirt project

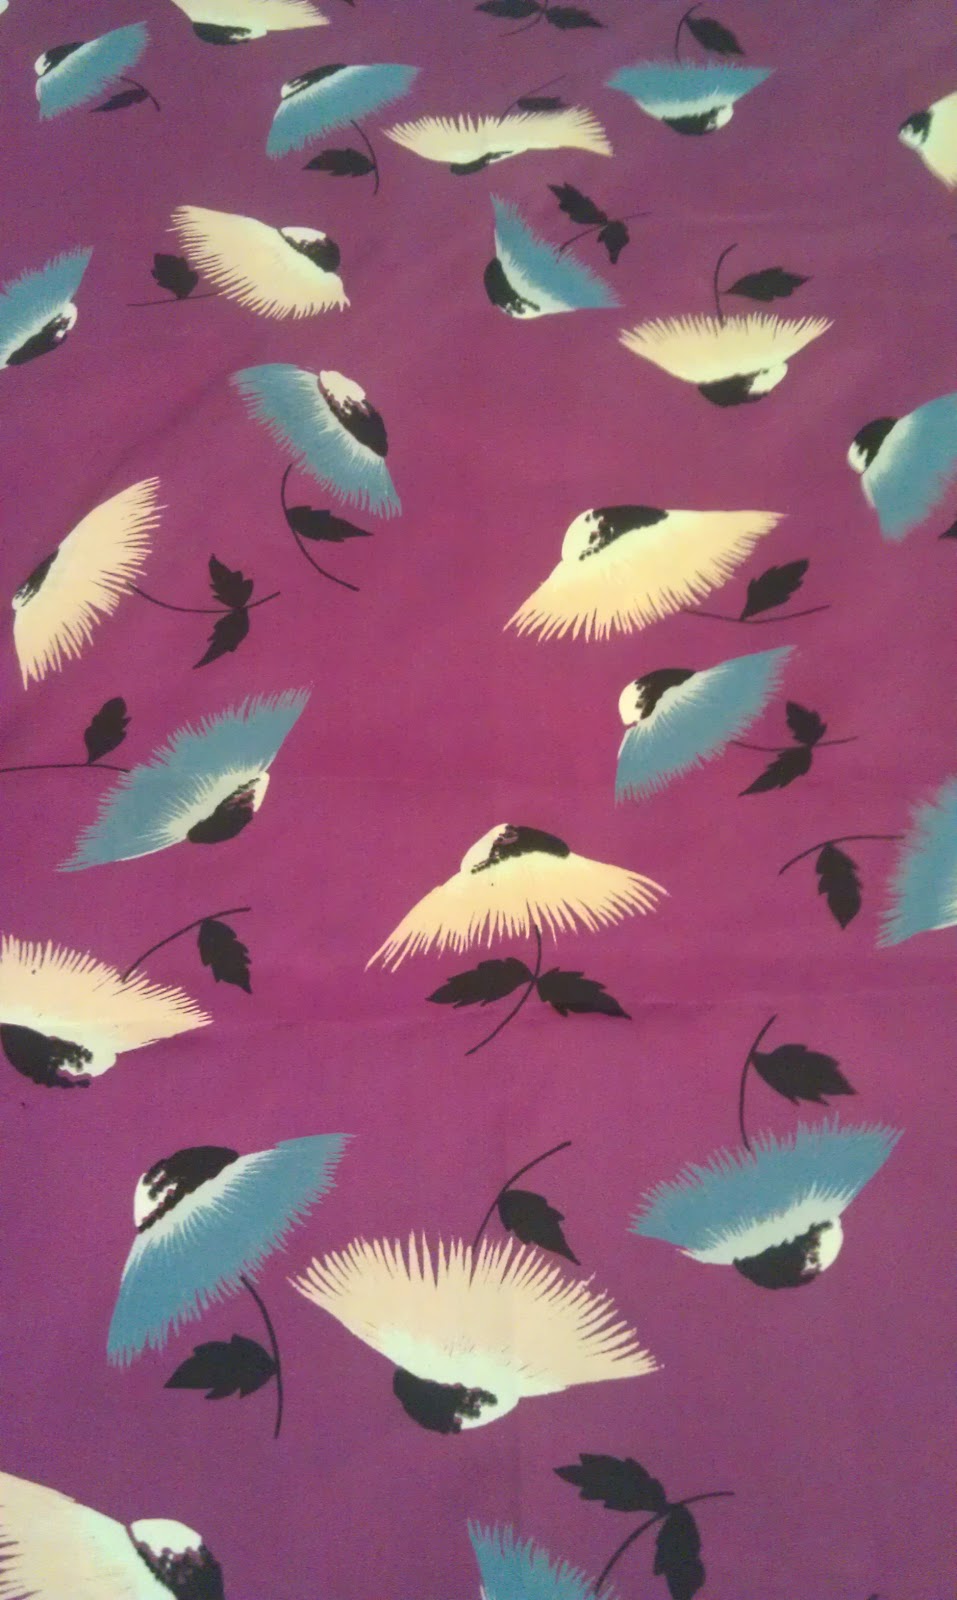
Hope everyone had a great weekend. We sure did! We stopped by our favorite thrift store on Saturday where I picked up some lovely vintage silk fabric.


I just love the colors and pattern, don't you? There were two yards, priced at $1.00 and I used half of it for my skirt project.

I simply wrapped the material around my waste two and a half times and then cut it. Then I sewed it together, front to front to form a tube.

I added twelve pleats, even spacing them and then sewed across the time. I also added a zipper. The final step was to hem the top and bottom and I was done!

I wanted it to be knee length since I was embracing a vintage feel. I added some black heels ( $12 from k-mart), white blouse (Kohls...only $1.50 after using my kohl's cash), black camisole (Aerpostale-$6) and some fish net stocking (I remember purchasing them in 10th grade but have no idea what I paid...)

Anyways, since I'm embracing the 50's maybe I'll go make dinner and do some vacuuming...all while wearing the heels of course.

Vintage Skirt Tutorial DIY

Vintage Style

Thursday, January 3, 2013

Newborn Quilt from old sweaters

Don't forget to enter to win this week's giveaway...3 yards of fabric! Click here for more info

We cleaned out our attic this week and came across a few old wool sweaters that my husband no longer wears.


These four sweaters were all made of of wool and a bit outdated. I ended up using the first, second and fourth ones.

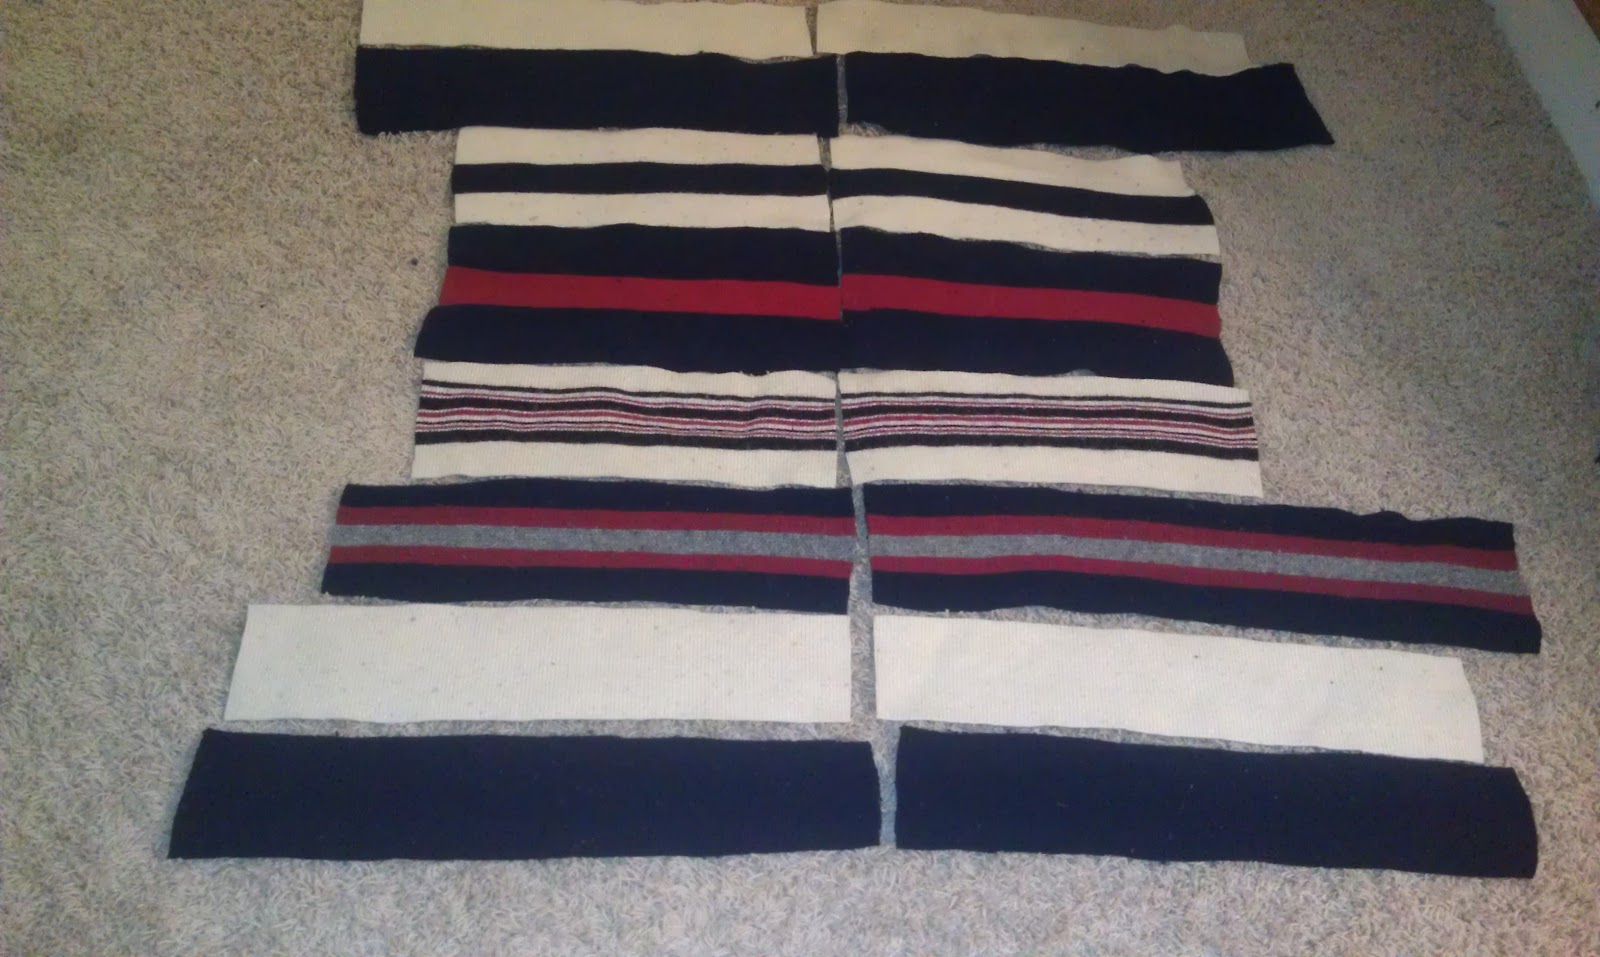
The first thing I did was cut out the strips that I wanted. I used as much of the sweaters as I could, making sure to get a variety of colors (using the sleeves and striped areas, as well as the solid areas)

Once I had cut out all the strips I wanted I had this:

Quilt from old wool sweaters

Next, I arranged them how I wanted them to look and began sewing the strips to one another (front side to front side)

Once all the strips were sewn together I cut the access edges, making the quilt a perfect square. Then I attached a layer of flannel for the inside and used another piece of white flannel for the back. I sewed the flannel and the wool together front to front and then flipped it inside out. I then hand stitched the hole that I left open and the quilt was finished!

Quilt from old wool sweaters

Here is the finished product

Wool Quilt from Old Sweaters

This picture shows you what the back of the quilt looks like

Wool quilt from old sweaters

It's the perfect size for a newborn and has some character because the material holds some meaning. A great way to use up some of your old sweaters don't you think!?


Monday, December 31, 2012

Fabric Giveaway!

Happy Monday!

There's no better way to start off a Monday than with a giveaway right? Well I am doing just that. Some of you may remember that a few weeks ago I was at an estate auction and came across a TON of fabric. Today's giveaway is for three beautiful yards of rose/red knit fabric that I got at that estate auction. It is medium weight and would make a great dress (or whatever else you'd like to use it for...I just happen to be a sucker for dresses...) 

It is untouched, in original condition and exactly three yards:


Use the Rafflecopter entry form below. Simply like our page on Facebook and you have an entry! Also, if you share the contest on Facebook you will receive an additional entry...so share away!

The contest will run through Friday (1/7/13) and is for US residents only.


Now...if you're wondering what amazing things you could do with  this knit fabric when you win, here are some ideas :)

Ruffle Knit Skirt

Ruffled Maxi Skirt

Wrap Knit Shirt Project

Long Sleeve wrap shirt

Knit Bathrobe Medium Weight
Bathrobe (I actually have one of these and I love it)

Jersey Knit Pillows

Need to dress up your bedroom or couch? How about some soft knit pillows?


However you choose to use it...keep me posted and post pics!


Monday, December 24, 2012

Sweater Dress Tutorial

Merry Christmas Eve! I'm getting so excited! Christmas Eve is one of my favorite days of the year and I hope you all have a great one.

Remember a few weeks ago when I bought 125 yards of knit fabric at an estate auction? Well, I've finally had enough time to do something with some of it.

I love sweater dresses and I've always wanted a white one. Some of the knit fabric I purchased was thick white, perfect for a warm, comfy, sweater dress.

I simply traced an old sweater dress I have and love and used it as a starting point for the new one. I wanted the new one to be long so I just continued down a little more. Once I finish my tracing I simply sewed the two pieces together (Front to front), hemmed the bottom and the neck areas and added sleeves. I like how it turned out and am excited to wear it. Oh...and for $.34 (two yards of fabric at $.17 a yard) it really was a great deal !!

Sweater Dress Tutorial

DIY Sweater Dress Easy Tutorial

DIY Sweater Dress Easy Tutorial

DIY Easy Sweater Dress Tutorial


Monday, December 3, 2012

A day at the Auction...

On Saturday we spent the day at an estate auction. We arrived at 9:30 and left at 3:30. It was a long day...especially with a little girl who wasn't interested in taking a nap (until we got in the car to drive home) but she was a trooper and we had a blast none the less.

What attracted me to this auction was that they had a TON of fabric. A TON. I'm not sure what the woman who lived there did but she definitely enjoyed sewing. They sold the fabric by the bag/box and by the end they were going for $.33 a bag! I ended up purchasing 125 yards of knit fabric (of various colors, stripes and solids) for $20!!  ($.17 a yard!) I'm so excited! I basically sought out all the knit fabric they had and got it. Since Joann's has such a limited supply of knits I have been dying to find some variation. I got just what I wanted and for so much less than paying retail. There were only about 50 people there and only about 5 that were bidding on the fabric.

Here is a picture of all the fabric folded and placed on the shelves of my new "sewing closet". (It currently a work in progress)


I also purchased an old Singer sewing machine. My current sewing machine doesn't do buttons, zippers or really anything besides sewing a basic stitch. I got the sewing machine for $3 and it came with 4 foot attachments, a ton of needles, the instruction manuals etc. I haven't tried it out though yet, but for $3 I figured it was worth a shot.


I also bought all of this thread (I color coordinated it after bringing it home) and the thread organizer for... $7!! There is a total of 325 spools of thread on it.


I bought 1 box full of elastic, over 50 rolls of un-opened elastic in varying sizes for $1


I bought another box for $1 that was filled with edging, lace, zippers, buttons etc.


Finally, I bought this cutting mat that unfolds into a HUGE board! It was also $1.


So, all in all I'd say I got about $2,000 worth of sewing materials for $33. Not bad for a days work :)


Friday, November 30, 2012

Upcycled Toddler Jeans


Everyone has an old pair of jeans that they no longer wear right? For me it was this pair of capris, they just never fit right and so they were in my "eventually-get-rid-of-unless-I-can-turn-them-into-something-interesting" pile.

Lilly is lacking in the jeans department, she only has one pair and that just won't do. Also, denim is pretty pricey at the fabric stores so I haven't gotten any there. I traced a pair of her pants onto my old jeans by folding them in half, as in the picture below. I did this twice, once on each leg.

DIY jean tutorial

Once I cut out the two pieces and unfolded them, they looked like the picture below. I placed them front to front and then sewed along the edge where you see the white line, stopping at the crotch.

DIY jean tutorial

Once these two lines were sewn I flipped the two pieces (so that the gold stitching that was in the center in the previous picture was now on the sides as in the picture below. Then I sewed up the legs (where the white lines are)


Finally, I added a band of elastic, folded the top over it and sewed. The whole project took me about 15 minutes.

I think they're adorable and I love that the sides and bottoms are professionally finished.

DIY Jean tutorial


Wednesday, November 28, 2012

Fun with buttons! (And Fleece Pants)

For those of you who have been following for a while you know I'm in a book club and you also probably know that it's the best book club ever! We just finished reading Bonhoeffer: Pastor, Martyr, Prophet, Spy and it was excellent. Well, last night was our annual Christmas Craft night and my friend Christine came up with the idea to make two adorable button crafts. The first is a wreath made out of buttons (simply string your buttons onto wire) and the second is a Christmas tree. (Buttons threaded onto twine in the shape of a tree) Aren't they adorable! The pictures below are of the finished ornaments hanging proudly on my tree.

Button Christmas Ornament


Button Christmas Tree Ornament


Also, I just had to share this picture of Lilly because her outfit is so cute...

I purchased this aqua colored fleece at Joann's on black Friday for only $.70 (it was in the remnant bin which was an additional 75% off) I had enough to make Lilly these cute pants as well as a fleece hat. The pants matched this onesie she already had perfectly!


Don't you like the heart on the leg?


Monday, November 12, 2012

Two Old T-shirts to color blocked skirt

I have a pile of old t-shirts in my sewing room that the Mr. has gotten rid of over the years.


Most have a stain or hole somewhere on them but the remainder of the material is just fine. Yesterday I pulled out two of them, a brown one and a yellow one and decided that they would make a cute color block skirt. I simply cut the t-shirts into three 'tubes' one tube from the yellow shirt and two tubes from the brown shirt. Then I cut those tubes in half so that I had six total pieces: two yellow and four brown. Below is a picture of the six pieces. (there are three pieces behind the three that you see)


After measuring my waste I cut the top part of the top piece so that it would fit my waste. I then cut a diagonal line from there to the bottom of the skirt on both sides, creating an A-Line shape. 
DIY color block skirt tutorial
 Finally, I sewed each piece together and then sewed up the sides. I used the bottom of the brown shirt as the bottom of my skirt which meant that It was already finished on the bottom...score! Because the skirt is knit I didn't feel the need to finish the top. The project took me a total of 30 minutes and I think it turned out super cute!

What can you do with old t-shirts

DIY Color block skirt


Wednesday, November 7, 2012

First Piece of my Spring Line...

Don't forget to pick out your fleece scarf! Click here for more info.

_________________________________________________________________________________

Top with scalloped sleeves


So I decided it would be fun to make a clothing line. I don't really know yet if anything will come of this or what the future might hold, but I think it would be a fun accomplishment none the less. My first piece is currently known as...wait for it...Piece #1.

Creative right?

So, if after seeing the pictures below you can come up with a better name...feel free to leave a comment below and I will pick the best one!

Scalloped sleeve top

A few thinks that I love about this top:


  1. The pleats on the front. They're probably hard to see in the photos but it adds great detail.
  2. The length, I love that it is short-falling just wear your belt would be.
  3. The scalloped cap sleeves! I wanted to do something different with the sleeves and love the scalloped edges.
What do you like about it?

2012 Spring Line Lindsey Ralls

Spring Line Lindsey Ralls


What would you like my next piece to be?