Showing posts with label Frugal Living. Show all posts

Wednesday, February 12, 2014

How to Make Money on Ebay

Well, now that I've got two little ones at home I'm trying to find opportunities to work from home. Something I've recently gotten into is selling things on Ebay. I thought I'd put together some info on how to make money doing this, in case anyone was interested.


Step 1: Create your Ebay Account

Step 2: Sign up for a Paypal account. This is the easiest way to receive and spend money online and a must when working with Ebay.

Step 3: Gather some inventory. I recently went to a local consignment store when they had all their clearance on sale for $1. I bought about 30 things and have been putting those items on Ebay. I only purchased name brand items that I felt confident would sell (Chicos, Ann Taylor LOFT, Paige, Banana Republic etc)

Step 4: List your items on Ebay. Depending on the item, some are listed individually and others are a lot of items (such as 4 pairs of dress pants all in the same size). If an item was new with the tags still on it, or a really high name brand (Such as the Paige jeans) I will list those things individually. It usually takes me about 15 minutes to list an item, this includes taking and uploading any pictures.

Step 5: Sell it!. Each listing lasts for about 5 days. I offer free shipping on all of my items to draw in more buyers. It doesn't cost any money to list an item on Ebay, it only costs if the item sells.

Step 6: Ship it. You can order flat rate boxes and envelopes from USPS to be delivered to your home for free. You can also schedule USPS to come to your house and pick up your packages (When they drop off your mail) for free. I didn't realize this until recently. In the past, I've gone to the post office to mail the packages and hated it, now things are so much better. I simply place my item in the flat rate box, attach the mailing label (that you can print off and pay for through Ebay/Paypal) on your computer and then hand it to the mailman. You never need to leave the house!

So, here's an example of an item I sold recently:

1 Pair of Paige Jeans: purchased at the consignment store for( $1.06)
Sold on Ebay for $19.99
Ebay fees ($2.00)
Shipping Fees ($5.25)

Total Profit Made: $11.68
Total Time spent: 30 minutes

So, if you have the inventory to do 10 or so of these things in a week, that's not too shabby as far as extra income goes right? You would make about $100 and would only spend about 5 hours each week working.

If you'd like to see my other Ebay listings click HERE


Wednesday, January 29, 2014

Newborn DIY dress

Remember the fabric I bought at the thrift store over the weekend? I paid $.50 for some cute pink knit fabric with blue sailboats on it.


I found an old onesie I had laying around (9 month size) and cut the bottom off of it.

Next, I cut two rectangles from the knit fabric, they measured about 3 inches wider than the width of the onesie. I sewed the two triangles together, front to front, creating a tube.

Then I sewed the "tube" to the oneside and hemmed the bottom.

For the "necklace" I ironed on some heat n bond to a piece of the knit fabric and then cut out the circles. Then I removed the backing and ironed them onto the top of the onesie. Finally, I sewed through the middle of each circle with a decorative stitch.

Now Miss Charlotte has a dress that was made just for her :)


Monday, March 11, 2013

High-Low Skirt

There's only three days left to enter this week's giveaway for a $25 Visa Gift Card, to enter-simply like my Facebook page by clicking here.

Now...onto something fun and creative. I've recently been loving the high-low look, both in skirts and in dresses. Here are some of my favorites from Pinterest.


I decided to make mine out of solid blue/purple knit material. First I wrapped the material around myself three times and cut, this was the width. The length was from my waste to my ankle. Next I sewed up the side so that I had a giant tube. Next, I folded the top down about 1 3/4 of an inch and sewed all the way around-leaving a two inch opening. Then I cut a piece of 1/2 inch elastic the length I desired and fed it through my 3/4 inch opening. Once I made it all the way around I sewed the two ends together and then sewed the opening closed. Now The waist of the skirt was gathered evenly around the top.

Finally, I cut the front of the skirt symmetrically to the height I wanted. I didn't hem the bottom because it was knit and I didn't feel like I needed to.

All in all, it was a pretty simple project and I love how it turned out. It is also very comfortable and you definitely can't pass up the comfort/cute combo. It's a win-win!

Thoughts?

High Low Dress

High Low Dress

Thursday, January 17, 2013

How to wear it: The Mini Skirt!

So yesterday I was backed into at a stoplight by someone who decided he wanted to change lanes and backed up without thinking that there might be someone behind him...fun stuff. Especially considering my beautiful new car was one week old...

So, by the end of the day and after talking with the insurance company, police officer etc...I was ready for some retail therapy!

I ended up at my favorite thrift store and spent $8...on 8 things!

One of these things was a corduroy skirt that I thought looked a little long. I was planning on coming home and shortening it but then when I tried it on I realized that it wasn't actually long it was just made in the 90's which meant it came all the way up to my belly button! So, what I thought was a skirt that would end around my knee, was actually a mini skirt-which is exactly what I was planning to turn it into!

Now that leggings are popular I love me some mini skirts. This particular one is a green corduroy, which I paired with a black top, black boots and black leggings. Not too bad for $.99 right?

Mini skirt outfit

Thrift store finds

Wednesday, January 9, 2013

More Pillows and a great book!

Two things for you today (to make up for not posting yesterday). I wish I was able to come up with a really great reason for why I didn't have a post yesterday but in reality it just boils down to the fact that I was watching The Bachelor Monday night instead of sewing...

First, for Christmas, my aunt gave me some gorgeous fabric that I decided to use for pillows for our bedroom. Nothing fancy in regards to the pillow design, but the fabric is beautiful and it works really well with the colors in our room.

DIY Pillows

The second thing is this great book that a friend of ours from church recently wrote. It is entitled "Buy Shoes on Wednesday and Tweet at 4:00" by Mark Di Vincenzo. I received one for Christmas as a gift from another friend of mine and love it! Basically it provides you with thousands of tips as to when is the best time to buy/sell/do just about anything. From yard sales to stocks, to purchasing a time share (he suggest that the best time to purchase a timeshare is never...even if it is being given to you for free...).


 His previous book, "Buy Ketchup in May and Fly at Noon" was on the New York Times bestseller's list. It was so popular that it demanded a follow up which is how "Buy Shoes..." came to be.

So, if you find that you often feel like you may be missing out on the best deals...check this book out. It is well organized and a quick read. I highly recommend it!


Thursday, January 3, 2013

Newborn Quilt from old sweaters

Don't forget to enter to win this week's giveaway...3 yards of fabric! Click here for more info

We cleaned out our attic this week and came across a few old wool sweaters that my husband no longer wears.


These four sweaters were all made of of wool and a bit outdated. I ended up using the first, second and fourth ones.

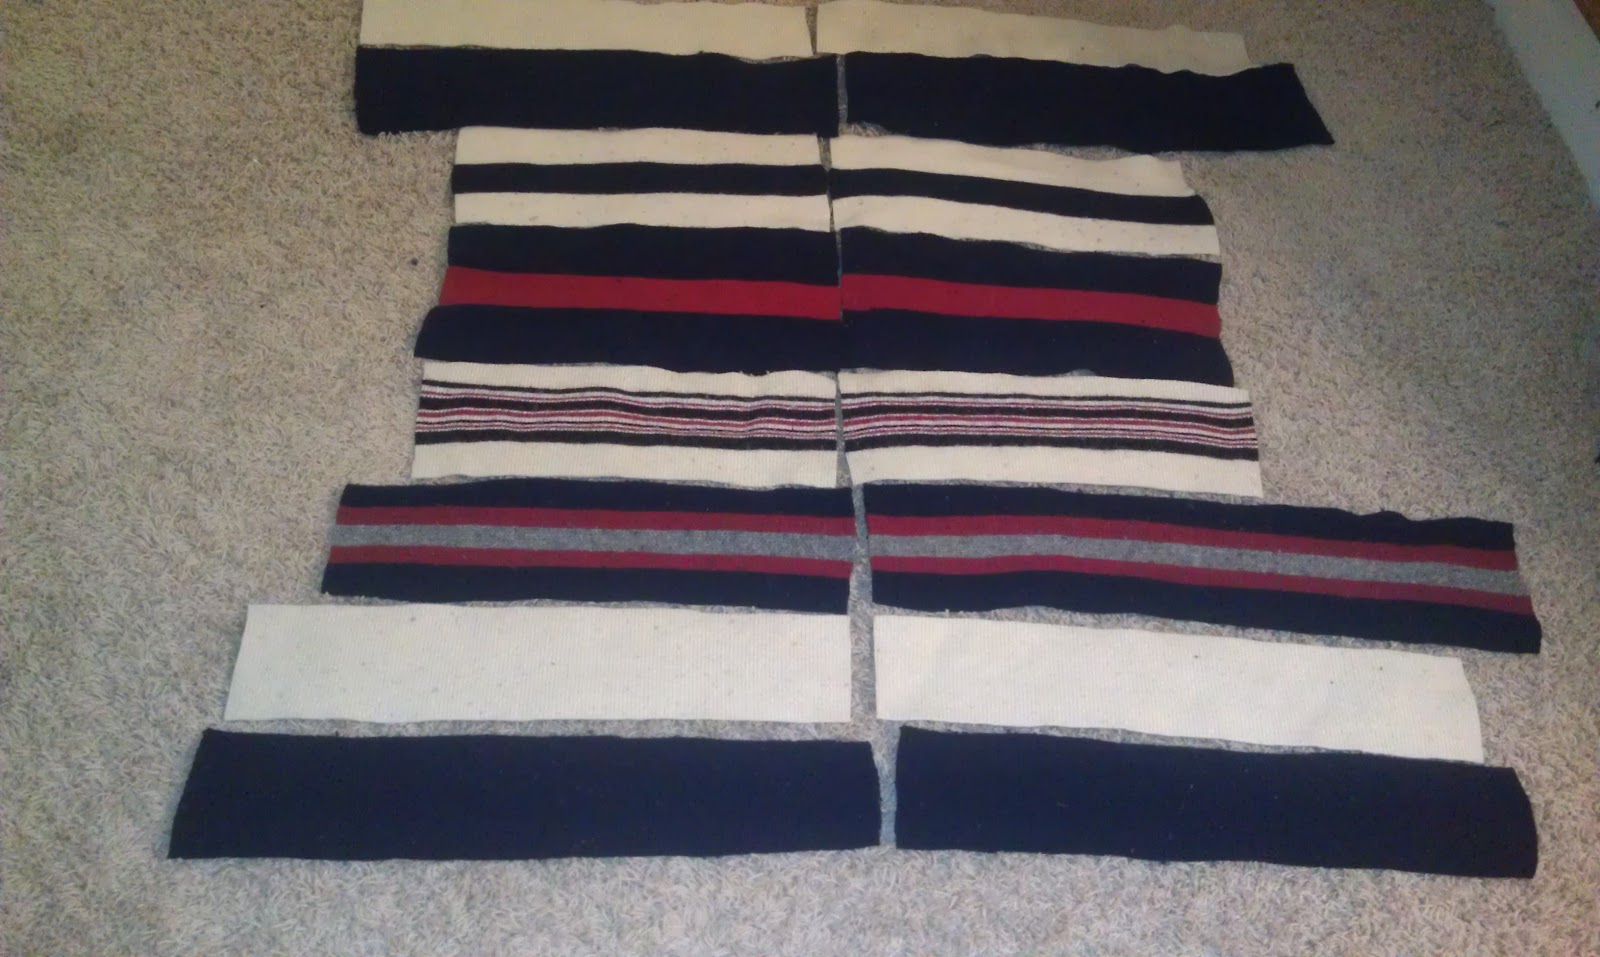
The first thing I did was cut out the strips that I wanted. I used as much of the sweaters as I could, making sure to get a variety of colors (using the sleeves and striped areas, as well as the solid areas)

Once I had cut out all the strips I wanted I had this:

Quilt from old wool sweaters

Next, I arranged them how I wanted them to look and began sewing the strips to one another (front side to front side)

Once all the strips were sewn together I cut the access edges, making the quilt a perfect square. Then I attached a layer of flannel for the inside and used another piece of white flannel for the back. I sewed the flannel and the wool together front to front and then flipped it inside out. I then hand stitched the hole that I left open and the quilt was finished!

Quilt from old wool sweaters

Here is the finished product

Wool Quilt from Old Sweaters

This picture shows you what the back of the quilt looks like

Wool quilt from old sweaters

It's the perfect size for a newborn and has some character because the material holds some meaning. A great way to use up some of your old sweaters don't you think!?


Friday, November 30, 2012

Upcycled Toddler Jeans


Everyone has an old pair of jeans that they no longer wear right? For me it was this pair of capris, they just never fit right and so they were in my "eventually-get-rid-of-unless-I-can-turn-them-into-something-interesting" pile.

Lilly is lacking in the jeans department, she only has one pair and that just won't do. Also, denim is pretty pricey at the fabric stores so I haven't gotten any there. I traced a pair of her pants onto my old jeans by folding them in half, as in the picture below. I did this twice, once on each leg.

DIY jean tutorial

Once I cut out the two pieces and unfolded them, they looked like the picture below. I placed them front to front and then sewed along the edge where you see the white line, stopping at the crotch.

DIY jean tutorial

Once these two lines were sewn I flipped the two pieces (so that the gold stitching that was in the center in the previous picture was now on the sides as in the picture below. Then I sewed up the legs (where the white lines are)


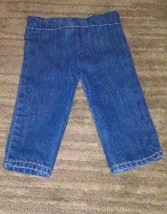
Finally, I added a band of elastic, folded the top over it and sewed. The whole project took me about 15 minutes.

I think they're adorable and I love that the sides and bottoms are professionally finished.

DIY Jean tutorial


Tuesday, November 27, 2012

How to Save on Christmas

I thought I'd share a few Christmas saving tips today. At a time when it is so easy to spend spend spend, every little bit can help right?

1. Kohl's Cash: Believe it or not Kohl's cash can be purchased on E-bay! Kohl's cash is basically a gift card that can only be used at Kohl's. Shoppers who receive this 'cash' after making a big purchase at Kohl's will sell it on E-bay for a discount. I bought $30 in Kohl's cash yesterday for only $23, which is 24% off! Next, wait for a good deal, or for something to go on sale and then pounce, you can end up making out really well. (For example, I believe their Keurig's are on sale this week, combine the sales price with the savings you made on the Kohl's cash and then add in an online discount code and you've got yourself a deal!

Christmas Savings

2. Homemade Gifts: Check out my post on some great homemade gifts that will save you some dough (Click Here)

How to save on Christmas

Looking for an easy, low cost gift? Check out my handmade scarves....only $4.99!

3. Ebay: Ebay has a lot more to offer...did you know you can buy gift cards on there? If you have someone on your list that you were planning on getting a $25 starbucks gift card for you can usually snag it on Ebay for about $22...not a huge savings but $3 is $3! (You can also typically find Starbucks gift cards at Costco or Sams for a deal as well..such as a four pack of $25 gift cards for only $80)


4. Consignment Shopping: Lilly is in need of some clothes this Christmas. I went to my favorite children's consignment shop yesterday and found her some adorable stuff, some with the tags still on! Specifically, I found these adorable Gymboree shoes for $6, tags still on them...new $22!

How to save on Christmas