

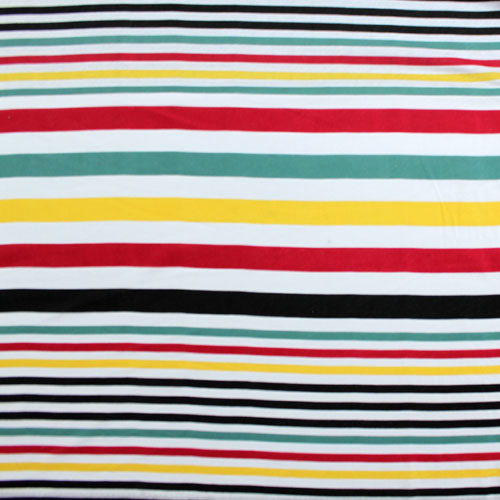
Remember a few weeks ago when I won the fabric giveaway for 2 yards of knit fabric from Girl Charlee?! Well, I FINALLY got around to doing something with it. As soon as I saw the fabric I knew I wanted to make a maxi dress out of it. Below is the fabric I picked out:
After Ironing the fabric I folded the two yards in half and cut it so that it was the correct length from my shoulders to my ankles. I then cut the folded side so that I had two equal pieces of fabric.

Next I cut out the neck area by folding the fabric in half again and making a 45 degree cut as seen in the picture below. Once the two pieces of fabric are unfolded you will have two identical V's in the center of each piece.

Next, I placed the two pieces front to front and sewed a straight line up the sides. I stopped a few inches down from the top, leaving enough room for my arms.
Finally, I sewed two straight lines across the top of the dress, on either side of the "V". I used as wide of a stitch as I could and made sure to leave plenty of thread tails on either end. The picture below shows the area where you would sew these straight lines (keep in mind that in this picture the material is still folded in half, you will be sewing the two pieces of material together after it is unfolded, but I wanted to give you some kind of visual as to what I'm referring to)

Next I pulled the back stitch slowly so that the material "scrunched" or "ruffled" together. For a more detailed explanation about how to do this, see this post. Once I got it scrunched up the way that I wanted I knotted the thread on both ends. This is why its important to leave long thread tails.
Finally I cut a thin strip of material to use as the tie and I was done. Since its knit it looked fine without doing any more hemming. I love love love the way it turned out and it is SO comfortable! I want to make six more so I can wear a different one every week!

(Also, I know what you're thinking..."Lindsey, that's a summer dress...it's October! Get with the program!" But alas, it's ok...I live in Hampton Roads and this week it has been 87 with full humidity...so it still feels like the middle of July here.)
Can you take a close-up pic of what the "ruffled" shoulder looks like? Also, do you have any problems with your bra showing in the arm holes? Whenever I've tried on dresses or shirts with that style arm-area, I find that unless I wear a cami underneath, my bra shows. :~(
ReplyDeleteI will do the close up, not sure when though haha. John was in charge of picture taking and he disappeared after one shot... Hopefully by tomorrow I'll post the close up :) My bra did originally show but then I went back and made the arm holes less 'open' and didn't have that problem. It's nice when you can make it fit just perfectly for you :)
Deleteit looks so easy to make ! at the same time it looks awesome!!!
ReplyDeleteThis looks so cute. I love the ruffled shoulders!
ReplyDeleteThis looks so cute. I love the fabric. Have you found jersey difficult to sew with? I'm a new sewer and I'd like to try jersey so I can avoid hemming, but I've read some places that it can be hard to work with.
ReplyDeleteThank you! It's really not that difficult. This material didn't have a lot of stretch to it and that makes it easier. Look for material with little stretch and also use the widest stitch on your machine. If you do those two things it's not any different than sewing with cotton :)
Delete