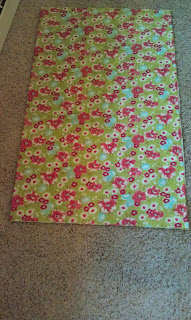
1. You start off with one yard of fabric. (36x42) The fabric I used for this project is from my sponsor Marie Madeline Studio. They have very high quality cotton fabric. This specific fabric is from the Ruby collection by Bonnie and Camille can be found here. Fold the yard of fabric in half so that it measures 36x21 (this is how it is folded in the picture below. Then cut along the fold so that you have two pieces that are 36x21.
2. Next you are going to place those two piece front to front and sew them together. When you are done you should have one piece of fabric that is 72x21. (See the picture below). Then place the two pieces on top of each other again (front to front) and sew the other ends together so that you have a circle that is 72x21.
3. Now you are going to hem the bottom. You will fold your material over two times so that it looks like the picture below. You do it twice so that you don't see any of the unfinished edge. Iron your folded material down so that the fold stays crisp.
Once it's ironed you can sew it as close to the edge as you can get. (See the picture below)
4. You are going to hem the top in just the same way as the bottom, but you will be running elastic through the top so you want to make sure that your fold is a little wider than it was at the bottom, wide enough for your elastic to fit through. I used 1/2 inch elastic on this skirt. You are also going to want to leave a 2 inch gap that is not sewn when you hem the top of the skirt. This is where you'll insert your elastic. The photo below shows the gap I left and me stringing the elastic through. Once the elastic has gone all the way around you will want to sew the two ends together. I went over mine multiple times because you definitely don't want it to break. (When deciding on the length of my elastic piece I just placed it around my waist and added one inch) Once you've sewn your two ends together you can sew the 2 inch hole closed.
You're elastic will be much shorter than the width of your skirt so it will gather together at the top. This simple skirt should work for almost any size because the length of your elastic is what determines the size. It is such an easy project and can be done in less than an hour. I really enjoyed doing it! Below is the finished product, what do you think?


Cute! Looks like something a novice sewer could do.
ReplyDeleteThis looks great. I think I could do this!
ReplyDeleteBetsy
http://mrspriceisrighthomeschooling.blogspot.com/
That fabric is super cute. This sounds a lot like one of my first sewing projects I found through pinterest and later duplicated. I've since made another and wear them a lot in the summer because they are very comfy. You can check them out here: http://thedomesticatedprincess.blogspot.com/2012/06/simple-spring-skirt-take-two.html. I'm enjoying your blog and am your newest follower!
ReplyDeleteBonny
Thanks for following! Checking your blog out now :)
DeleteAnother cute skirt. I was hoping that you would link to my link party again this week. It runs from Wednesday to Sundays.
ReplyDeletehttp://www.adornedfromabove.com/2012/08/tangerine-toner-and-wednesdays-adorned.html
I hope to see you there. Have a great Day.
Debi Bolocofsky
Adorned From Above
www.adornedfromabove.com