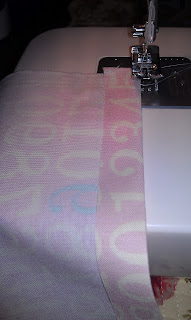
I started out by measuring how long and wide I wanted the skirt to be. I just eyed this based on other clothing items Lilly has. Remember, add an extra inch to the width and an extra two inches to the height when measuring, you will be using up these when you hem.
One I had my measurements, I cut two identical pieces and ironed down the bottom edges about 1/2 an inch so that I could hem them. Below is a picture of the ironed edge and then me sewing the edge. Do this on both pieces of material.
Then I placed my two pieces front to front and sewed up the sides, when you're done you'll have a "tube"
The next step is to add your elastic. I used 3/4 inch elastic. I measured around Lilly's waste determine how much I need and added an extra 1/2 inch to that number so that I would have enough to overlap the ends and sew them together.
Then I folded the top of the skirt down, ironed it so that it would stay in place, and sewed (just like I did with the bottom hem) and made sure I allowed myself enough room so that I would be able to slide my elastic through the space. (Don't try to make it a tight fit...it just results in being frustrated, if you allow yourself plenty of room this step will only take a minute) When sewing, leave about a 1-2 inch gap that is open so that you can slide the elastic through. Below is a picture of me sewing the space where the elastic will go through
Once you've slid your elastic through, overlap the ends and sew them together (do a few rows bath and forth to make sure it stays). Then you can sew your 1-2 inch gap closed also. And you're done! I loved the way the skirt turned out and can't wait to make some more, but for Lilly and myself.
Also, here's a tip, when ironing...remember that your iron is on and it's hot! I burned myself twice during this project....so don't do that!!


This turned out really cute!
ReplyDeleteSo cute!! I love the fabric, too! Your newest follower. Thanks for stopping by my blog. :)
ReplyDelete