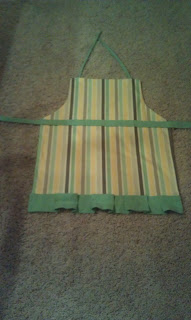
The fabric I used for this project is from my wonderful sponsor Raspberry Creek Fabrics. The specific fabric I used can be found here.
I started by folding my fabric in half and ironing it. I hate working with wrinkled fabric! By holding the fabric up to me I decided I wanted the width to be 24 inches. I measured the length from my neck to my knee and then cut a giant rectangle.
Next I folded this fabric in half and cut at an angle so that the fabric at the top of the apron slowly became smaller in width. At this point I was cutting through four pieces of fabric
When I unfolded the two pieces of fabric it looked like this
Then I sewed the strip across the middle with coordinating fabric from Raspberry Creek. I did this by double folding each side and sewing. I attached it to the apron by sewing a single strip across the middle.
Then I attached the straps at the top.
I wanted to dress it up a bit and thought this box ruffle would be cute.
It was very easy to do and added a lot of character. It just requires folding and pinning, then I attached it by sewing down the middle.
And we're done! What do you think? Now I just need to bake something!!


Thanks for the shout out! And thanks for making an apron. I told a friend I would make one for her and now I have directions!! I should probably make one for myself since I don't even own one. You would think with the pie baking I would have one, but alas I do not.
ReplyDelete